Every family has that one recipe that brings everyone together, and in ours, it’s the Bacon Cheese Puffs – a simple, delightful snack that has become a symbol of our gatherings. It all began on a crisp autumn evening, during a casual family get-together at our cozy home.
My sister, Annie, with her culinary flair, decided to whip up something new and tantalizing. Using our favorite ingredients – sharp cheddar, savory bacon, and onions – she created these little bites of joy. Fresh out of the oven, their golden-brown, crispy exterior and the melt-in-your-mouth cheesy center made them an instant hit.
The kitchen, usually the heart of our home, was filled with more laughter and chatter than usual. Nieces and nephews lined up, wide-eyed and eager, as each batch was brought out. Even Uncle Joe, who’s a bit of a food critic, couldn’t stop himself from reaching for seconds.
These Bacon Cheese Puffs aren’t just about the tantalizing blend of cheese and bacon; they’re about the warmth, the smiles, and the togetherness they bring. They’ve witnessed stories, shared jokes, and the simple joy of being together. This recipe has become more than just a snack for us – it’s a piece of our family tradition.
As I share this recipe with you, I hope it brings the same warmth and togetherness to your family gatherings. Whether it’s a casual evening with friends or a special family event, these Bacon Cheese Puffs are sure to be a crowd-pleaser.
Now, let’s get baking and create memories that last a lifetime, one delicious puff at a time.
How to prepare the Bacon Cheese Puffs
Ingredients:
- 1/2 cup milk
- 1 egg (lightly beaten)
- 2 cups grated cheese (a sharp cheddar is best)
- 2 medium onions (finely chopped)
- 3 slices bacon (finely chopped)
- 1 cup self-raising flour
- 1 tsp grainy mustard (or French mustard)
Directions:
- Start by preheating your oven to 350°F. This ensures the oven reaches the right temperature by the time you’re ready to bake.
- In a mixing bowl, whisk together the egg and milk until well combined. This mixture will help to bind all the ingredients together.
- Gradually add the grated cheese, chopped onions, and finely chopped bacon to the egg and milk mixture. Stir everything together to ensure an even distribution of ingredients.
- Next, sift the self-raising flour into the bowl. This helps to prevent lumps and ensures a smoother batter.
- Add the teaspoon of grainy mustard (or French mustard if preferred) to the mixture. Fold all the ingredients together until just combined, being careful not to overmix.
- Prepare a cookie sheet by lightly greasing it. This prevents sticking and helps in easy removal of the puffs after baking.
- Using a rounded teaspoon, scoop out portions of the mixture and place them onto the greased cookie sheet. Be sure to leave some space between each puff as they will expand slightly during baking.
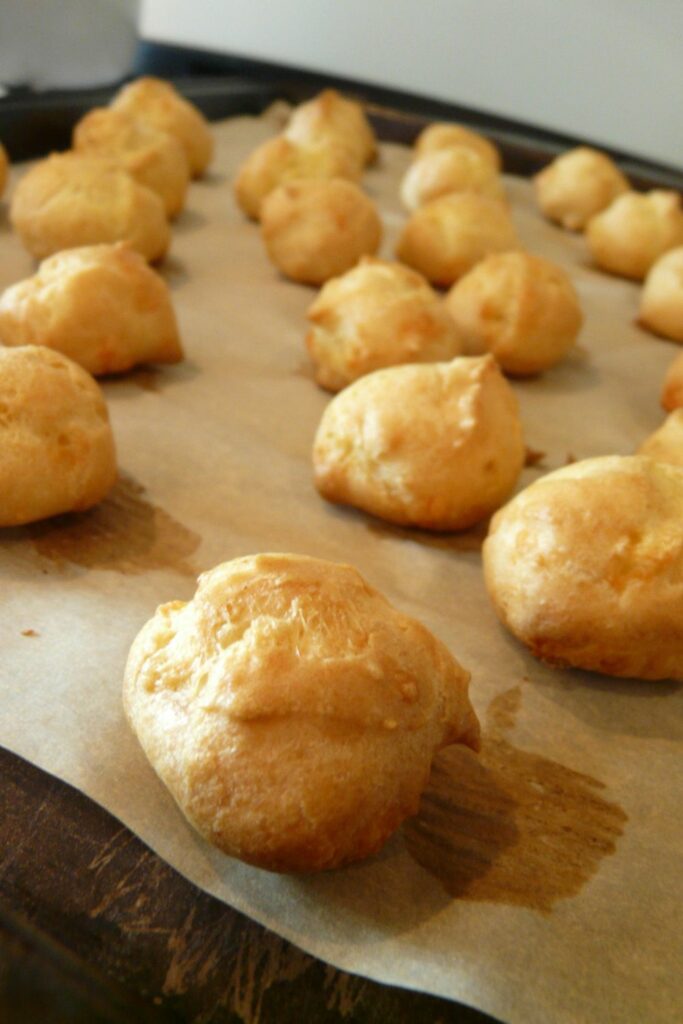
- Place the cookie sheet in the preheated oven and bake the puffs for approximately 20 minutes. Keep an eye on them, looking for a golden brown color as a sign they are done.
- Once baked, remove the Bacon Cheese Puffs from the oven. Allow them to cool for a few minutes on the cookie sheet, then transfer them to wire racks to cool completely. This helps maintain their texture.
Enjoy your Bacon Cheese Puffs as a delicious appetizer or snack!
FAQs:
What type of cheese works best for Bacon Cheese Puffs?
A sharp cheddar cheese is recommended for Bacon Cheese Puffs because it provides a rich, strong flavor that complements the savory bacon and onion. Furthermore, sharp cheddar melts well, which ensures a gooey and creamy texture within the puffs.
Can Bacon Cheese Puffs be prepared in advance?
Yes, you can prepare the mixture for Bacon Cheese Puffs ahead of time and store it in the refrigerator until ready to bake. Additionally, baking them just before serving ensures they are warm and crispy. The prepped dough can be refrigerated for up to 24 hours, making it a convenient option for planning ahead.
What is the best way to store leftover Bacon Cheese Puffs?
Leftover Bacon Cheese Puffs can be stored in an airtight container at room temperature for up to 2 days. For longer storage, you can also refrigerate them for up to a week. Additionally, reheating them in the oven or toaster oven will help to restore their original crispiness before serving.
Is there a gluten-free option for making Bacon Cheese Puffs?
To make Bacon Cheese Puffs gluten-free, substitute the self-raising flour with a gluten-free self-raising flour blend. Moreover, ensure that the other ingredients, such as the grainy mustard, are certified gluten-free to avoid any contamination.
What are the best serving suggestions for Bacon Cheese Puffs?
Bacon Cheese Puffs are versatile and can be served as an appetizer, snack, or side dish. They pair wonderfully with a side of creamy dipping sauce such as ranch or blue cheese. Additionally, they are a great addition to any party platter, complementing other finger foods and snacks.


Bacon Cheese Puffs
Ingredients
- 1/2 cup milk
- 1 egg lightly beaten
- 2 cups grated cheese a sharp cheddar is best
- 2 medium onions finely chopped
- 3 slices bacon finely chopped
- 1 cup self-raising flour
- 1 tsp grainy mustard or French mustard
Instructions
- Preheat oven to 350°F.
- Combine egg and milk, and stir into remaining ingredients.
- Drop by rounded teaspoon onto a lightly greased cookie sheet.
- Bake until golden (about 20 minutes).
- Cool on wire racks.