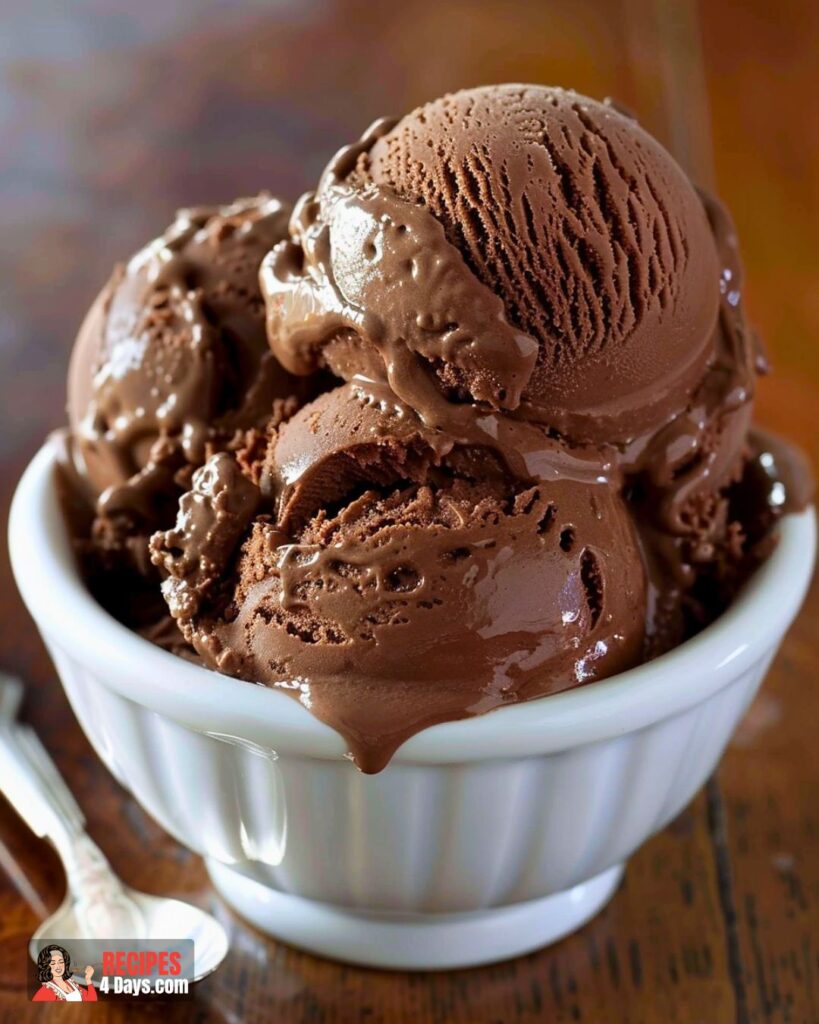
Chocolate ice cream is a beloved treat that never fails to bring a smile to my face. Growing up, homemade ice cream was a staple at family gatherings, especially during the sweltering summer months. My grandmother had an old-fashioned ice cream maker that required a bit of elbow grease, but the effort was always worth it for the rich, creamy results. This old-fashioned homemade chocolate ice cream recipe takes me back to those days, combining simple, quality ingredients to create a dessert that’s both nostalgic and irresistibly delicious.
One of the things I love about this recipe is its simplicity. With just a handful of ingredients, you can create an ice cream that’s far superior to anything store-bought. The blend of unsweetened cocoa powder, cane sugar, light brown sugar, and sea salt provides a balanced sweetness with a hint of depth from the brown sugar. Whole milk and heavy cream ensure a luxuriously creamy texture, while a splash of vanilla extract enhances the chocolate flavor without overpowering it.
For a personal touch, I sometimes like to add mix-ins or toppings. Chopped nuts, chocolate chips, or a swirl of caramel sauce can take this classic recipe to new heights. Another variation that’s always a hit in my household is adding a teaspoon of instant espresso powder to the mix. It intensifies the chocolate flavor and adds a subtle coffee note that pairs perfectly with the creamy base.
When making this ice cream, I always remember to pre-freeze the ice cream canister. This step is crucial for achieving the right consistency. Also, I prefer to serve the ice cream right out of the churn for a soft-serve experience. However, if you prefer a firmer texture, transferring the ice cream to an airtight container and freezing it for a few hours will do the trick.
This old-fashioned homemade chocolate ice cream recipe is more than just a dessert; it’s a reminder of family, tradition, and the joy of making something special from scratch. Whether you enjoy it plain or with your favorite mix-ins, it’s sure to become a cherished favorite in your home as well.
Making the Old-Fashioned Homemade Chocolate Ice Cream
Click here to get printable version
Ingredients
- 1/2 cup light brown sugar
- 1 1/2 cups whole milk
- 1 tablespoon vanilla extract
- 2/3 cup cane sugar
- 1 cup unsweetened cocoa powder
- 3 1/4 cups heavy cream
- 1 teaspoon sea salt
Directions
- First, pre-freeze the canister for your ice cream maker to ensure it is properly frozen before use.
- In a large bowl, combine the cane sugar, light brown sugar, cocoa powder, and sea salt using a whisk.
- Pour in the whole milk and whisk until the sugars and cocoa powder have completely dissolved, which should take around 1-2 minutes.
- Add the heavy cream and vanilla extract, whisking until the mixture is smooth and well-blended.
- Turn on your ice cream maker. Pour the prepared mixture into the pre-frozen canister, ensuring the churn paddle is in place.
- Cover the ice cream maker and let it churn until the mixture thickens, which typically takes about 20-25 minutes.
- Once the ice cream reaches a soft-serve consistency, it is ready to eat. For firmer ice cream, transfer it to an airtight container and freeze for 2-3 hours before serving.
Storing Suggestions:
Store the ice cream in an airtight container in the freezer. For the best texture, consume within 1-2 weeks. Allow the ice cream to soften at room temperature for a few minutes before scooping.
FAQs:
Can I use a different type of sugar for this recipe?
Yes, you can use other types of sugar such as granulated sugar or coconut sugar. However, this may slightly alter the flavor and texture of the ice cream.
What can I do if I don’t have an ice cream maker?
If you don’t have an ice cream maker, you can pour the mixture into a shallow dish and freeze it, stirring every 30 minutes until it reaches the desired consistency. This process may take a few hours.
Is it possible to make this recipe dairy-free?
Yes, you can substitute the whole milk and heavy cream with coconut milk or almond milk for a dairy-free version. Keep in mind, the texture and flavor might differ slightly.
How can I make my ice cream creamier?
For a creamier texture, you can add an extra tablespoon of vanilla extract or a small amount of corn syrup. These additions help to reduce the formation of ice crystals.
Can I add mix-ins like chocolate chips or nuts?
Absolutely! You can add chocolate chips, nuts, or other mix-ins during the last 5 minutes of churning. This ensures they are evenly distributed throughout the ice cream.
How long should I churn the ice cream for the best results?
Churning typically takes about 20-25 minutes. However, the exact time may vary based on your ice cream maker. The ice cream should be thick and have a soft-serve consistency when it’s done.

Old-Fashioned Homemade Chocolate Ice Cream
Ingredients
- 1 cup unsweetened cocoa powder
- 2/3 cup cane sugar
- 1/2 cup light brown sugar
- 1 teaspoon sea salt
- 1 1/2 cups whole milk
- 3 1/4 cups heavy cream
- 1 tablespoon vanilla extract
Instructions
- Before starting, make sure to pre-freeze the ice cream canister for your ice cream maker to ensure proper freezing.
- In a large mixing bowl, whisk together the cocoa powder, cane sugar, brown sugar, and sea salt.
- Whisk in the whole milk until the sugars and cocoa powder are dissolved, about 1-2 minutes.
- Add the heavy cream and vanilla extract, whisking until fully combined.
- Turn on your ice cream maker and pour the mixture into the pre-frozen canister with the churn paddle in place.
- Cover the ice cream maker and let it churn until the mixture thickens, about 20-25 minutes.
- When the ice cream reaches a soft, creamy texture, it's ready to serve. You can scoop it into bowls right away for soft-serve ice cream or transfer it to an airtight container and freeze for 2-3 hours for a firmer texture. Serve when ready.