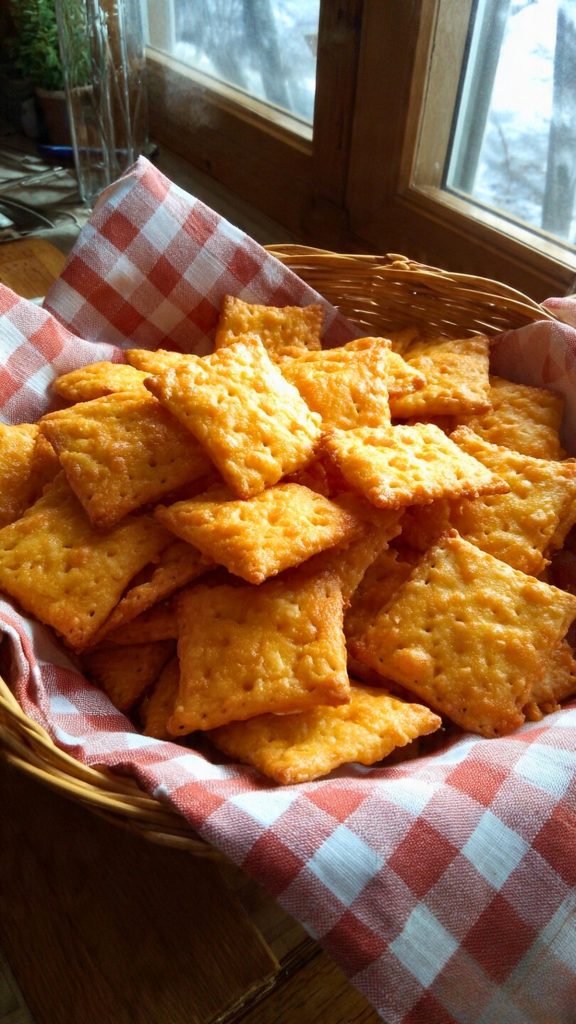
Every fall, I seem to end up with the same problem: everyone wants snacks, the oven’s already on for dinner, and the budget doesn’t really love pricey gluten free crackers. That’s when these gluten free cheese crackers earn their spot in my regular rotation. They’re simple, they use basic pantry staples, and they taste like a fresher, more satisfying Cheez-It copycat.
This recipe is especially handy on cooler afternoons when you want something warm and salty to go with a bowl of soup, a game day spread, or school lunch prep. Shredded cheddar, a straightforward gluten free flour blend, and butter are all you really need. The food processor does the heavy lifting, and the dough comes together in minutes. You can roll and cut them while the oven heats, and you’ll have a tray of crisp, golden crackers before you’d ever get to the store and back.
If you’re trying to keep snacks affordable, control ingredients, and still get that nostalgic cheese-cracker crunch, this is a practical solution. The dough is flexible, so you can make tiny shapes for kids, or slightly thicker crackers for dipping. Once you see how easy it is to bake a batch with seasonal cheddar and a bag of gluten free flour, you may stop buying boxed versions altogether.
All About Gluten Free Cheese Crackers
Click here to get printable version
Ingredients
- 8 ounces cheddar cheese (mild or sharp), shredded
- 4 tablespoons unsalted butter, slightly softened
- 1 cup gluten free flour blend (*see note)
- 1/2 teaspoon salt
- 1/8 teaspoon garlic powder
- 3 tablespoons cold water, plus a little more if needed
- 1/8 teaspoon onion powder (optional, for extra flavor)
- 1 teaspoon coarse salt (for sprinkling over the crackers)
Bringing the Story to Your Kitchen: The Method
- Add the shredded cheddar, butter, gluten free flour blend, salt, garlic powder, cold water, and onion powder (if using) to a food processor. Pulse, then blend on medium until the mixture forms a soft dough. The cheese should be finely chopped and the dough should hold together when pressed.
- If the dough seems dry or crumbly and doesn’t clump easily, add cold water 1 teaspoon at a time, pulsing after each addition, just until it comes together. Avoid over-wetting; it should feel like firm, pliable cookie dough.
- Preheat your oven to 375ºF (190ºC). Line a baking sheet with parchment paper for easy cleanup and to prevent sticking.
- Transfer the dough onto a sheet of parchment paper. Lightly dust your rolling pin and the top of the dough with gluten free flour so it doesn’t stick.
- Roll the dough out as evenly and as thin as you can while still being able to move the cut pieces—aim for about 1/16 to 1/8 inch thick. Use a pizza wheel or pasta cutter to slice the dough into small squares or rectangles.
- If you’d like fun shapes (great for kids or holiday snack boards), press mini cookie cutters into the dough to cut out pieces, gathering and re-rolling scraps as needed.
- Gently nudge each cracker apart with the edge of the pizza wheel or a thin spatula so there’s a bit of space between them. This gap helps them crisp up instead of baking into one large sheet.
- Use the end of a chopstick or a skewer to poke a small hole in the center of each cracker. Sprinkle the tops with coarse salt, or skip this if you prefer a lower-sodium snack.
- Bake for 12–15 minutes, or until the crackers are deeply golden around the edges and feel set to the touch. For the crispiest results, let them cool completely on the tray before storing in an airtight container.
Getting Extra-Crispy Edges
If you want that really satisfying crunch, the thickness of the dough and the bake time matter. Roll the dough as evenly as possible; thicker areas will bake up softer while thin spots get crisp. Aim for a uniform sheet, about the thickness of a coin. If you’re unsure, bake one small tray first and note how long it takes to get the color and texture you like, then adjust for the next batch. For even more snap, you can turn off the oven and let the crackers sit inside for 3–5 extra minutes with the door slightly open so they dry out without over-browning. Just keep an eye on them, since gluten free flours can darken quickly once they’re fully baked.
Flavor Twists to Try
Once you’ve made the basic gluten free cheese crackers, it’s easy to adjust them to what’s in season or on sale. Add a pinch of smoked paprika or chili powder for a fall-friendly snack that pairs well with hearty soups and chilis. A little dried thyme or rosemary works nicely if you’re serving them on a cheese board. For kids, you can skip the onion and garlic and add just a tiny bit more salt for a milder, Cheez-It style flavor. You can also swap in part of the cheddar for another hard cheese like parmesan; just remember that stronger cheeses are saltier, so you may need to reduce the added salt slightly.
Recipe Help: Frequently Asked Questions
Why do I need a food processor instead of mixing the dough by hand?
The food processor finely chops and disperses the cheese and butter through the gluten free flour, which is hard to do evenly by hand. That fine texture is what gives you a smooth dough and a uniform, crisp cracker. When you mix by hand, the cheese pieces stay larger, so they melt into little pockets and can leave the crackers greasy or uneven. The processor also keeps the dough from being overworked, which matters with gluten free flour; you want it just combined, not mashed into a paste.
How can I keep the crackers crispy after storing them?
Moisture is the main enemy of crisp crackers, especially with gluten free flours, which can absorb humidity quickly. Make sure the crackers are completely cool and dry to the touch before storing. Use an airtight container and avoid stacking them while warm. If they soften after a day or two, spread them out on a baking sheet and reheat at 300ºF for 4–6 minutes, then cool again. You can also tuck a small piece of parchment-wrapped rice or a food-safe desiccant packet in the container to help absorb excess moisture.
What kind of gluten free flour blend works best for these cheese crackers?
A good all-purpose gluten free blend that already includes xanthan gum usually works best. Blends that are very heavy in starch (lots of tapioca or potato starch) can make the dough more crumbly and the crackers slightly chewy instead of crisp. If your blend is very fine and starchy, you may need less water and a slightly shorter bake time. On the other hand, blends with more whole grains like sorghum or brown rice can give a deeper flavor but may need a minute or two longer in the oven to crisp. When in doubt, test a small batch first and adjust water and time for your specific flour.

Gluten Free Cheese Crackers
Equipment
- food processor
- Rolling Pin
- Baking sheet
Ingredients
Cracker Dough:
- 8 ounces cheddar cheese mild or sharp
- 4 tablespoons butter unsalted
- 1 cup gluten free flour blend *see note
- 1/2 teaspoon salt
- 1/8 teaspoon garlic powder
- 3 tablespoons cold water
- 1 teaspoon coarse salt for sprinkling over the crackers
Optional Additional Seasoning:
- 1/8 teaspoon onion powder optional
Instructions
- Place the cheddar, butter, gluten-free flour blend, salt, garlic powder, cold water, and (if using) onion powder into a food processor. Pulse until the cheese is finely chopped and the mixture begins to come together; hand mixing won't produce the same fine texture.
- Run the processor on medium speed for about 30 seconds until the dough holds. If the dough feels dry because your flour blend is starchier, add a teaspoon of cold water at a time until it's workable.
- Preheat the oven to 375°F (190°C).
- Transfer the dough onto a sheet of parchment paper. Lightly dust your rolling pin with gluten-free flour to keep the dough from sticking.
- Roll the dough as thinly as possible while still allowing you to lift the cut pieces. Use a pizza wheel or pasta cutter to trim the dough into small squares or rectangles.
- If you prefer shaped crackers, use mini cookie cutters to cut out designs like little fish.
- Gently separate the cut crackers so they are not touching on the parchment; a pizza wheel can help lift and move them without deforming.
- Press a hole through the center of each unbaked cracker with a chopstick, then sprinkle with coarse salt, unless you are limiting sodium.
- Bake for 12–15 minutes or until the crackers turn golden and crisp. Remove and let cool completely on a wire rack—the crackers will firm up as they cool.