Have you ever wanted that “Bakery” fresh bread but don’t really have a bakery right around the corner? Or maybe you don’t want to pay $5 bucks for a bakery loaf OR maybe you don’t have a good bakery near you, well guess what….THIS IS IT!!! I swear on my first puppy THIS BREAD IS AWESOME!! It is so easy to make and so quick it will make
you slap your husband. I was shocked! Trust me I am a bread maker too and I have used my hands and bread machines. I have never came across an easier and tastier bread to make than this one.
I wish I could take all the credit for this creation but of course I can’t. This recipe came from a site that I have grown to love. It is called Alexandra’s Kitchen (this link will take you directly to the bread recipe).
Her site has video of how to make this bread, but trust me after you make it one time and take a bite of that first piece, it will be embedded in your brain and you will NEVER forget it.
I make it using the 1qt and a 1.5qt Pyrex bowl. It does take two bowls. I wish I had two 1qt bowls but right now I only have one.
The difference in the two bowls is really the shape. The image at the top is the 1.5qt and it is a bit thinner in width, so when you slice it you get a bit of a longer piece. By the way, it slices beautifully…..
The 1qt bowl (on the bottom), that loaf stands up higher so your get a wider piece. Does that make sense? It all taste delish, but the piece is a bit wider.
Either way, these two loafs didn’t last very long at my house on a Friday evening. I made two more loafs Saturday morning and by Sunday they were just about gone.
I do keep it in the refrigerator because there is nothing in it to preserve it so I don’t really want it going bad on me before they get eaten. Sunday morning we woke up and served Toast-n-Gravy by toasting slices of this bread, WOW!
Then for the Cowboy game Mom made Po’Boy sandwiches for the guys and they loved it
. Anyway, if you want to see the video of how to make this bread which is basically mixing it and then forking it LOL, check it out at Alexandra’s Kitchen.
I will tell you I have been using Active Dry Yeast and doing the “lukewarm” technique.
** To make fool-proof lukewarm water that will not kill the yeast (water that’s too hot can kill yeast), boil some water — I use my teapot. Then, mix 1 1/2 cups cold water with 1/2 cup boiling water. This ratio of hot to cold water will be the perfect temperature for the yeast.
Here is the recipe. Enjoy!
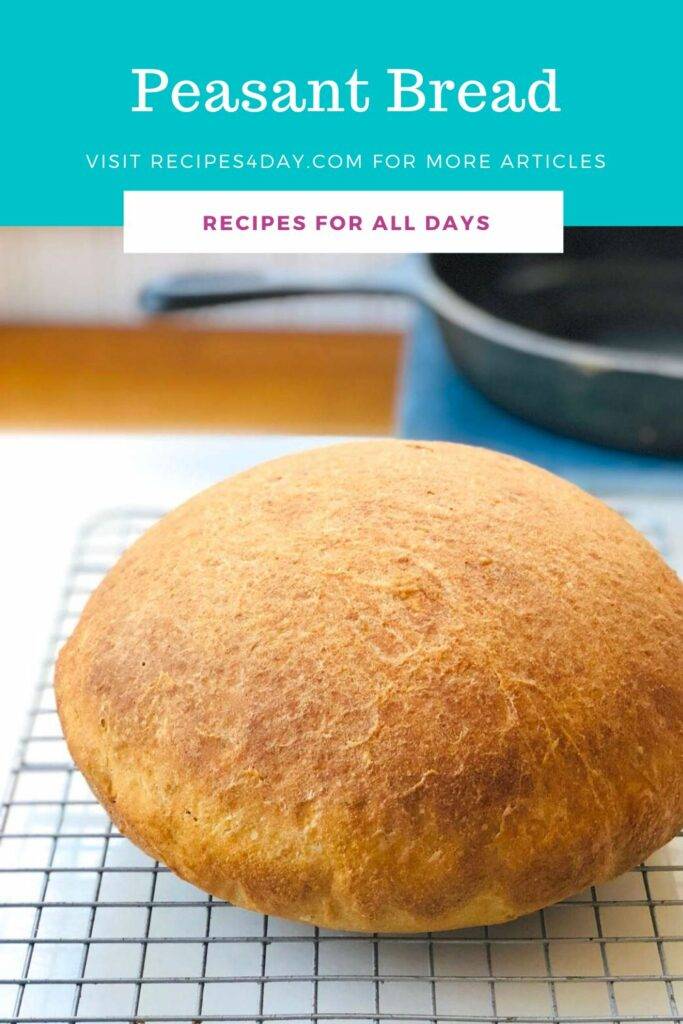
Peasant Bread
Ingredients
- 4 cups 1 lb. 2 oz all-purpose flour* (do not use bleached all-purpose)
- 2 teaspoons kosher salt
- 2 cups lukewarm water**
- 1 tablespoon sugar
- 2 teaspoons active-dry yeast***
- 2 tablespoons butter room temperature
Instructions
- In a large mixing bowl whisk the flour and the salt. Set aside. Grease a separate large bowl with butter or olive oil and set this aside. (This is optional actually — I now just let the bread rise in the same bowl that I mix it in. My mother, however, always transfers the dough to a greased bowl.)
- In a small mixing bowl, dissolve the sugar into the water. Sprinkle the yeast over top. There is no reason to stir it up. Let it stand for about 10 to 15 minutes or until the mixture is foamy and/or bubbling just a bit — this step is just to ensure that the yeast is active. (See photo above.) Now, gently stir it up, and add to the flour bowl. Stir this mixture up with a spatula or wooden spoon. Mixture will be sticky. Scrape this mixture into prepared greased bowl from step 1. (Or, if you’re feeling lazy, just cover this bowl with plastic wrap or a tea towel.)
- Cover bowl with a tea towel or plastic wrap and set aside in a warm spot to rise for at least an hour. (If you have the time to let it rise for 1.5 to 2 hours, do so — this will help the second rise go more quickly.) This is what my mother always does: Preheats the oven at its highest temperatureits lowest setting for just one minute, then shuts off the oven. UPDATE 01/05: Preheat the oven for a total of one minute — do not allow the oven to get up to 300ºF, for example, and then heat at that setting for 1 minute — this will be too hot. Just let the oven preheat for a total of 1 minute — it likely won’t get above 300ºF. The goal is to just create a slightly warm environment for the bread. Next, she runs a tea towel under hot water and rings it out so it’s just damp. Finally, she covers the bowl containing the bread with the damp tea towel and places it in the warm, turned-off oven to rise. It usually takes about an hour to double in bulk, but letting it rise for an hour and a half or up to two hours is fine.
- Preheat the oven to 425ºF. Grease two oven-safe bowls (such as the pyrex bowls I mentioned above) with about a tablespoon of butter each. (My mother might use even more — more butter not only adds flavor but also prevents sticking). Using two forks, punch down your dough, scraping it from the sides of the bowl, which it will be clinging to. As you scrape it down try to turn the dough up onto itself if that makes sense. You want to loosen the dough entirely from the sides of the bowl, and you want to make sure you’ve punched it down. Take your two forks and divide the dough into two equal portions — eye the center of the mass of dough, and starting from the center and working out, pull the dough apart with the two forks. Then scoop up each half and place into your prepared bowls. This part can be a little messy — the dough is very wet and will slip all over the place. Using small forks or forks with short tines makes this easier — my small salad forks work best; my dinner forks make it harder. It’s best to scoop it up fast and plop it in the bowl in one fell swoop. Let the dough rise for about 20 to 30 minutes or until it has risen to just below or above (depending on what size bowl you are using) the top of the bowls.
- Bake for 15 minutes. Reduce the heat to 375º and make for 15 to 17 minutes longer. Remove from the oven and turn the loaves onto cooling racks. If you’ve greased the bowls well, the loaves should fall right out onto the cooling racks. If the loaves look a little pale and soft when you’ve turned them out onto your cooling racks, place the loaves into the oven (outside of their bowls) and let them bake for about 5 minutes longer. Remove from oven and let cool for 10 minutes before cutting.

