If you’ve ever pulled a baked potato out of the oven and found it gummy in the middle or with sad, wrinkly skin, you’re not alone. For a long time, I treated baked potatoes as a backup side dish, mostly because the results were all over the place. Then I dialed in a simple method that makes the texture reliable: crisp, seasoned skin and a fluffy center every single time.
This baked potato recipe has become my go-to solution when I need something filling, budget-friendly, and easy to customize. With just russet potatoes, olive oil, and sea salt, you get a base that works with whatever you have in the fridge — beans, steamed broccoli, Greek yogurt, or just a pat of butter if that’s your style. It’s also naturally gluten-free and can be made fully plant-based without any extra effort.
What I like most is how hands-off it is. Once the potatoes are scrubbed, oiled, and salted, the oven does the work. Meanwhile, you can throw together a salad, sauté some greens, or prep a quick protein. If you’re trying to eat a bit lighter, a baked potato with a few smart toppings easily passes for a complete meal: high in fiber, surprisingly satisfying, and way more interesting than plain rice.
Cozy Up with Homemade Baked Potato
Click here to get printable version
The Required Ingredients
- 4 medium russet potatoes, scrubbed and dried
- Extra-virgin olive oil, for rubbing
- Sea salt, to taste
Technique-Focused Instructions
- Preheat your oven to 425°F (220°C). Line a baking sheet with parchment paper for easier cleanup and to prevent sticking. While the oven heats, make sure your potatoes are completely dry; excess moisture can soften the skins.
- Use a fork to poke several holes all over each potato (this lets steam escape and helps prevent bursting). Place the potatoes on the prepared baking sheet. Drizzle or brush each one with a thin, even coat of olive oil, making sure the entire surface is lightly covered. Sprinkle generously with sea salt on all sides so it adheres to the oil. The skins should look glossy and well-seasoned.
- Transfer the tray to the oven and bake for 45 to 60 minutes, depending on the size of your potatoes. You’re looking for potatoes that feel very tender when pierced with a fork and have firm, crackly skins. If they still feel firm in the center, keep baking in 5–10 minute increments.
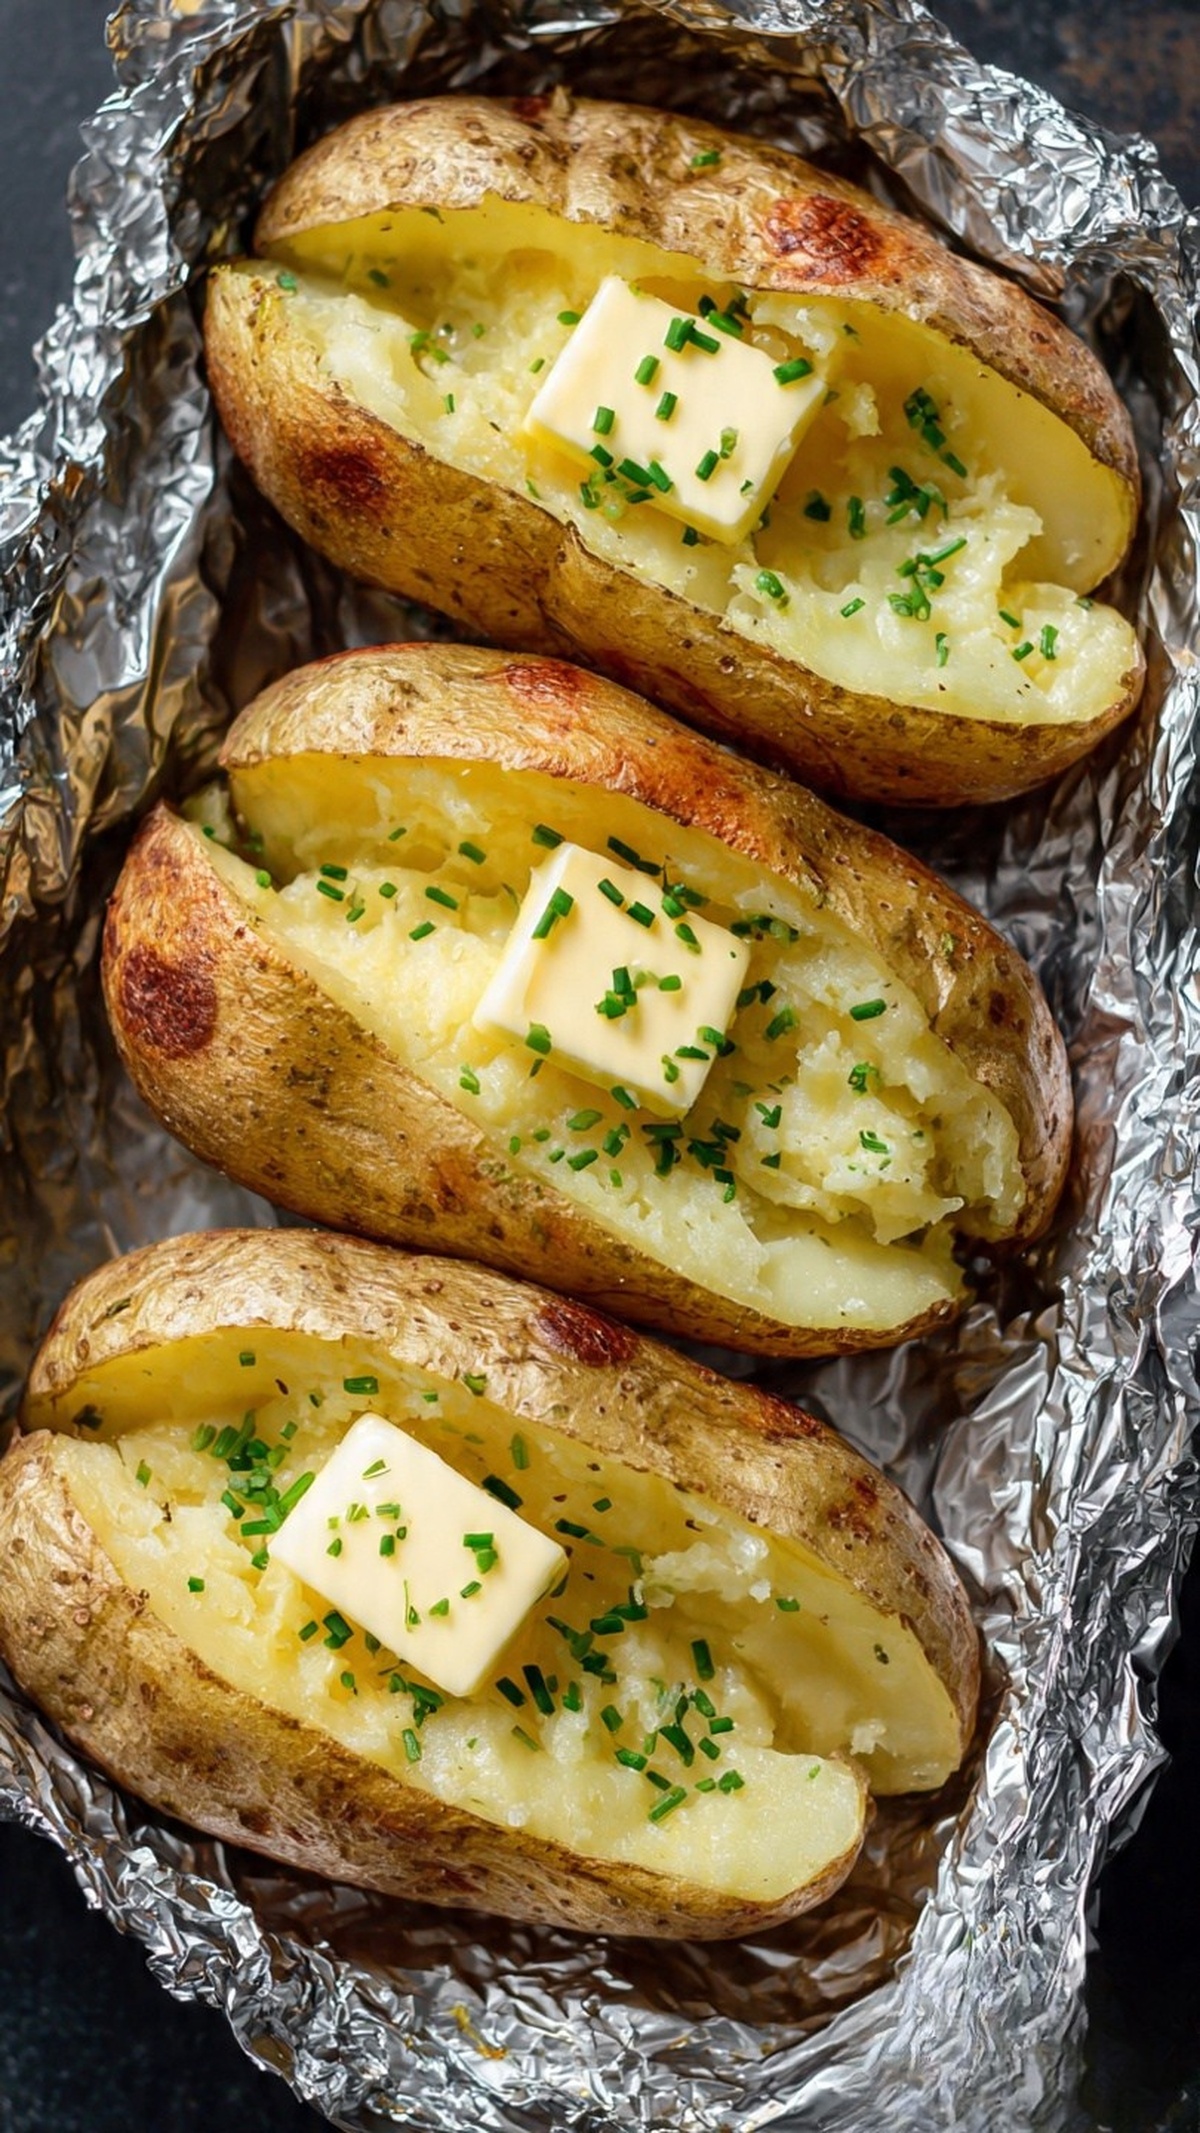
- Once done, remove from the oven and let them sit for 2–3 minutes so the steam redistributes. Using a sharp knife, slice each potato lengthwise down the center. Use a fork to gently fluff and separate the interior, pushing the ends of the potato toward the middle if you want it to open up more. Add your preferred toppings and serve immediately while hot.
Getting Extra Crispy Skins
If you want the skins to be the highlight of your baked potato, there are a few adjustments that make a big difference. First, choose russet potatoes of similar size so they cook evenly; their higher starch content naturally gives you crisper skins than waxy varieties. Dry the potatoes thoroughly after scrubbing — any surface moisture will steam the skin instead of letting it crisp. Don’t skimp on the olive oil: a thin, complete coating helps the salt stick and encourages browning. For an even crispier finish, you can bake the potatoes directly on the oven rack (with a tray on a lower rack to catch any drips) for the last 10–15 minutes. If you’re watching fats, you can slightly reduce the oil, but avoid removing it entirely or the skins will stay tough instead of crisp.
Checking for Doneness
Proper doneness is what separates a perfect baked potato from a dense, undercooked one. Instead of relying only on time, use a fork or thin skewer as your guide. When the potato is ready, you should be able to slide the fork into the center with almost no resistance. The skin will feel firm and slightly crackly when you gently press it. If you have an instant-read thermometer, aim for an internal temperature of around 205–210°F (96–99°C), which is where the starches have fully gelatinized and the interior turns fluffy. If the middle still feels tight or slightly waxy when you test it, give the potatoes more time in the oven and check again every 5–10 minutes.
Recipe Help: Frequently Asked Questions
Can I make this baked potato recipe a complete, healthier meal on its own?
Yes, a baked potato can easily become a balanced meal with the right toppings. Start with the potato as your high-fiber, complex carbohydrate base. Add a source of protein like black beans, lentils, cottage cheese, Greek yogurt, or shredded chicken. Then bring in vegetables such as steamed broccoli, sautéed spinach, or a quick cabbage slaw for extra micronutrients. Finish with a modest amount of healthy fat — a drizzle of olive oil, a sprinkle of cheese, or some avocado. This structure keeps the meal satisfying while supporting steady energy and avoiding heavy, overly rich combinations.
How can I reduce the oil and salt without losing flavor or texture?
If you’re trying to keep things lighter, you can slightly adjust the oil and salt while still preserving a good result. Use just enough olive oil to barely coat the skins — about 1/2 teaspoon per potato brushed on with a pastry brush works well. For salt, season more lightly before baking, then add a pinch of finishing salt to the cut side after cooking, where you’ll taste it more directly. To boost flavor without extra sodium, rub the skins with garlic powder, smoked paprika, or dried herbs before baking. These add depth so you won’t miss the heavier seasoning.
Can I bake the potatoes ahead of time and reheat them?
You can, and it works especially well for meal prep. Bake the potatoes as directed, then let them cool completely. Store them whole in an airtight container in the refrigerator for up to 3–4 days. To reheat, place them directly on the oven rack at 375°F (190°C) for about 15–25 minutes, until hot in the center and the skin has re-crisped. Avoid microwaving if you care about texture; it warms them quickly but tends to soften the skin and can make the interior slightly rubbery. If you must use a microwave, finish for a few minutes in the oven or toaster oven to restore some crispness.
What’s the best way to adapt this for an air fryer instead of the oven?
Air fryers do a great job at producing crisp skins in less time. Prepare the potatoes exactly the same way — scrub, dry, poke with a fork, then rub with olive oil and sea salt. Preheat your air fryer to 390–400°F (200°C) if your model requires preheating. Arrange the potatoes in a single layer with space between them so air can circulate. Cook for about 35–45 minutes, turning once halfway through. Start checking for doneness at 30 minutes by piercing them with a fork. If the skins brown too quickly before the centers are tender, lower the temperature slightly and continue cooking until the interior is fully soft and fluffy.
Baked Potato
Equipment
- Baking sheet
Ingredients
- 4 medium russet potatoes
- extra-virgin olive oil for coating
- sea salt to taste
Instructions
- Heat the oven to 425°F (220°C) and line a baking sheet with parchment paper.
- Pierce each potato several times with a fork. Arrange them on the prepared sheet, rub the skins with olive oil until coated, and scatter sea salt evenly over each potato.
- Bake for about 45–60 minutes, or until a fork easily pierces the flesh and the skins are crisp. Remove from the oven, slice open, fluff the interior with a fork, and top as desired before serving.