Some weeks it feels like there’s always one more thing to pack for school lunches or one more snack to throw together before an activity. That’s where these Peanut Butter & Jelly Sandwich Cookies earn their place. They taste like the classic PB&J my kids already love, but in a cookie form that feels special without taking all afternoon.
I like this recipe because it uses pantry basics I almost always have on hand: butter, peanut butter, flour, sugar, and a jar of jelly. No fancy decorations, no chill time, and no mixer tricks you have to baby-sit. You mix, bake, cool, and sandwich. The dough is sturdy, the steps are straightforward, and the result looks far more impressive than the effort it takes.
These work well for busy weeknights, classroom parties, or when you just need a treat to keep everyone happy for a few days. The cookies stay soft, the peanut butter filling adds richness, and the strawberry preserves give that familiar PB&J hit. If you’re after a recipe that feels fun for kids but practical for you, these Peanut Butter & Jelly Sandwich Cookies are a very low-stress way to get there.
Your New Go-To Recipe: Peanut Butter & Jelly Sandwich Cookies
Click here to get printable version
What Goes In
- 1 cup (2 sticks) unsalted butter, softened
- 1 cup crunchy peanut butter
- 1 cup light brown sugar, packed
- 3/4 cup granulated sugar
- 2 large eggs
- 1 teaspoon vanilla extract
- 1 1/2 cups salted peanuts, chopped
- 2 1/2 cups all-purpose flour
- 1 teaspoon baking soda
- 1/2 teaspoon baking powder
- Granulated sugar, for rolling
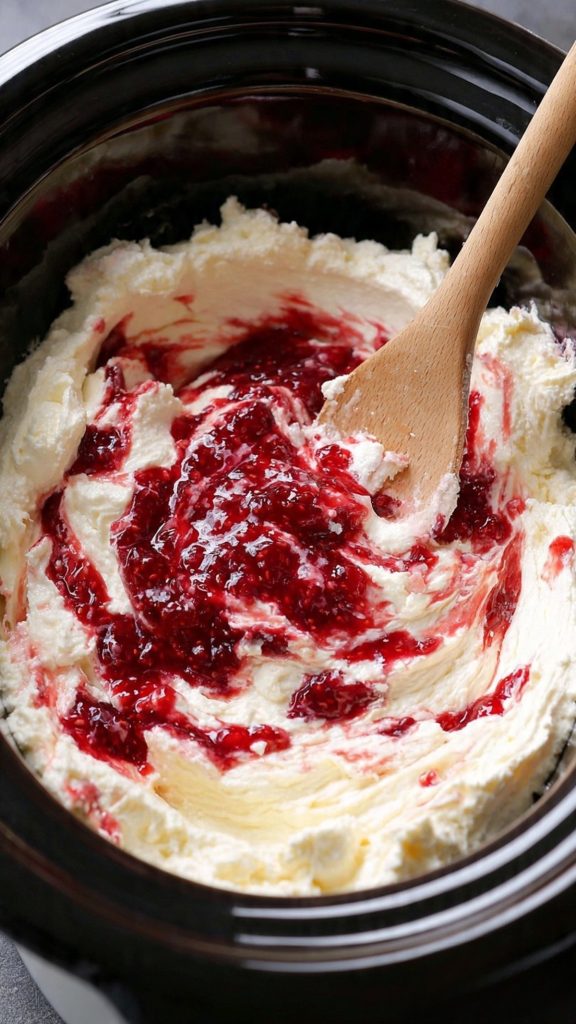
- 1/2 cup peanut butter, for filling
- 1/2 cup strawberry preserves or jelly, for filling
Let’s Begin
- Preheat your oven to 375°F (190°C). Line your baking sheets with parchment paper so the cookies release easily and clean-up is faster.
- In a medium bowl, whisk together the flour, baking soda, and baking powder until everything looks evenly mixed. Set this dry mixture aside so it’s ready when you need it.
- In a large mixing bowl, beat the softened butter until it’s smooth. Add the crunchy peanut butter and continue mixing until the two are fully combined and creamy.
- Scrape down the sides of the bowl, then add the light brown sugar and granulated sugar. Beat until the mixture is light and fluffy; it should look pale and slightly increased in volume.
- Add the eggs and vanilla extract, mixing just until they’re incorporated. Scrape the bowl again so no thick streaks remain on the bottom or sides.
- With the mixer on low, add the flour mixture in batches. Mix only until the dough comes together; stop as soon as you don’t see dry flour to avoid tough cookies.
- Stir in the chopped salted peanuts until they’re evenly distributed. The dough will be thick and slightly sticky.
- Use a medium cookie scoop or tablespoon to portion the dough into balls. Roll each ball in granulated sugar to lightly coat the outside.
- Arrange the dough balls on the prepared baking sheets, leaving space between them for spreading. Gently press each ball flat with a fork in a crisscross pattern, just like a classic peanut butter cookie.
- Bake for 9–11 minutes, until the edges are lightly golden but the centers still look soft. Don’t wait for them to turn fully brown or they’ll end up dry.
- Let the cookies rest on the baking sheet for about 5 minutes to firm up, then transfer them to a wire rack to cool completely before filling.
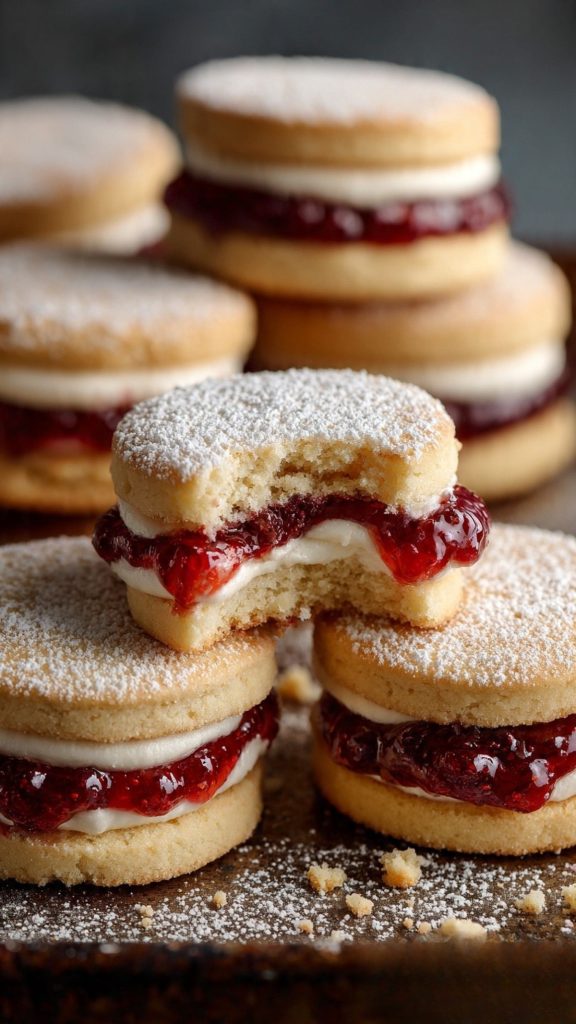
- Once the cookies are cool, flip half of them upside down. Pipe or spoon a small dollop of peanut butter onto each flipped cookie, then add a similar amount of strawberry preserves or jelly on top of the peanut butter.
- Gently press a plain cookie on top of each filled cookie to make sandwiches. Twist slightly as you press so the filling spreads evenly without squeezing out the sides.
Make-ahead And Storage
These Peanut Butter & Jelly Sandwich Cookies are easy to work into a busy week if you plan a little. You can make the dough up to 48 hours in advance and keep it covered in the fridge; just let it sit at room temperature for 10–15 minutes so it’s easier to scoop. For longer storage, roll the dough into balls, freeze them on a tray, then transfer to a freezer bag. Bake from frozen, adding 1–2 minutes to the bake time. Once assembled, store the sandwich cookies in an airtight container at room temperature for 2–3 days, or in the fridge for up to 5 days if your kitchen runs warm. Make sure the cookies are completely cool before sandwiching so the filling doesn’t melt and soak in.
Tips For Making Pb&j Cookie
For even, professional-looking PB&J cookies, focus on a few small details. First, soften the butter properly; it should press easily with a finger but not be greasy or melted, or the cookies may spread too much. Chopping your own salted peanuts gives better texture and saves money compared to pre-chopped nuts. When you roll the dough in sugar, don’t press too hard with the fork — a light crisscross is enough to flatten without cracking the edges. If your dough feels too sticky, chill it for 20–30 minutes. For the filling, use a thicker jelly or preserves so it doesn’t run; if yours is loose, stir it in a small bowl to thicken slightly before piping or spooning.
Change The Flavor With Fillings
You can keep the base cookie the same and switch up the fillings to match whatever you have in the pantry or what’s in season. Grape jelly gives a classic lunchbox feel, while raspberry or mixed berry preserves add a little tartness that cuts through the richness of the peanut butter. In fall, try apple butter or a cinnamon-spiced jam for a more seasonal twist. You can also mix a spoonful of honey into the peanut butter filling for extra sweetness, or stir in a pinch of salt if your peanut butter is unsalted. Stick with thicker spreads so the sandwiches hold together and travel well for lunches or snacks.
Before You Try It: FAQs
Can I use natural peanut butter for these cookies?
Natural peanut butter can work, but you’ll need to adjust slightly. Because natural varieties separate and are usually looser, the dough can turn oily or spread too much. If you use natural peanut butter, make sure it’s very well stirred and choose a brand that’s on the thicker side. You may need to add 2–3 extra tablespoons of flour to keep the dough from being too soft. Do a test bake with 1–2 cookies first; if they spread too much, chill the dough for 30 minutes before baking.
How do I keep the cookies soft after baking?
The key to soft Peanut Butter & Jelly Sandwich Cookies is not overbaking. Pull them out when the edges are just turning golden and the centers still look slightly underdone; they’ll finish setting on the hot tray. Once cooled and sandwiched, store them in an airtight container so they don’t dry out. If they do firm up more than you like, place a slice of sandwich bread in the container for a few hours. The cookies will absorb some moisture from the bread and soften again without getting soggy.
What’s the best way to fill the cookies without making a mess?
If you want neat PB&J layers, using piping bags or zip-top bags helps. Spoon the peanut butter into one small bag and the jelly into another, snip a small corner off each, and pipe a circle of peanut butter in the center of the cookie, then a smaller circle of jelly on top. This keeps the jelly contained so it doesn’t leak out the sides. Avoid overfilling; it’s better to start with less, gently press the top cookie, and add a bit more next time if you prefer a thicker layer.
Can I bake the cookies smaller or larger for different occasions?
Yes, the dough is flexible, but you’ll need to adjust timing. For bite-size sandwich cookies, use a small scoop and start checking around 7–8 minutes; they should be just set at the edges. For larger bakery-style sandwiches, make bigger dough balls and bake closer to 11–13 minutes, watching so they don’t overbrown. Keep the cookies similar in size on each tray so they bake evenly. Always cool completely before filling, especially with larger cookies, since they hold heat longer and can melt the filling if rushed.

Peanut Butter & Jelly Sandwich Cookies
Equipment
- Stand or hand mixer
- Mixing Bowls
- Measuring cups & spoons
- Baking sheet
- parchment paper
Ingredients
Cookie Dough:
- 1 cup (2 sticks) butter softened
- 1 cup crunchy peanut butter
- 1 cup light brown sugar
- 3/4 cup granulated sugar
- 2 eggs
- 1 teaspoon vanilla extract
- 1 1/2 cups salted peanuts chopped (best if chopped by hand)
- 2 1/2 cups all-purpose flour
- 1 teaspoon baking soda
- 1/2 teaspoon baking powder
Filling & Finishing:
- granulated sugar for rolling (use a little for extra crunch)
- 1/2 cup peanut butter for filling
- 1/2 cup strawberry preserves or jelly for filling
Instructions
- Heat the oven to 375°F (190°C) and line a baking sheet with parchment paper.
Cookie Dough:
- Whisk together the flour, baking soda, and baking powder in a medium bowl; set this dry mix aside.
- In a mixer bowl, beat the softened butter until smooth, then add the 1 cup crunchy peanut butter and mix until fully incorporated and creamy.
- Scrape down the sides, add the brown and granulated sugars, and beat on medium speed until the mixture is light and airy. Add the eggs and vanilla, beating until combined.
- Fold in the reserved dry ingredients on low speed just until combined. Stir in the chopped peanuts by hand or on low to distribute evenly.
- Portion the dough into medium-sized balls. Roll each ball in a little granulated sugar to coat, then place on the prepared baking sheet leaving space to spread.
- Flatten each dough ball gently with a fork in a crisscross pattern to create the classic cookie appearance.
- Bake for about 9–11 minutes, or until the edges begin to turn golden. Allow the cookies to rest on the sheet for a few minutes before transferring them to a wire rack to cool completely.
Assembly:
- Once cooled, flip half the cookies over. Pipe or spread about 1 teaspoon each of peanut butter and strawberry preserves onto the flipped cookies, then sandwich with the remaining cookies to form PB&J cookie sandwiches.