I first tried making Burrito In A Jar when I was looking for a way to prep a hearty meal that didn’t require a lot of last-minute work. Sometimes, you just want to open something homemade and have dinner ready in minutes, especially after a long day. This recipe is a practical answer to that. It’s great for sharing, too—whether you’re feeding a family, packing lunches, or bringing something to a potluck. Everyone can grab a jar, heat it up, and customize their burrito just the way they like.
What I like about this dish is how it brings together pantry basics—beans, rice, ground beef, and a few vegetables—into something that feels complete. The jar method means you can make several servings at once, and they’ll keep well until you need them. No scrambling to cook beans or rice at the last minute. Plus, it’s flexible. If you’re cooking for two, you can halve the recipe. If you’re feeding a crowd, just double up.
I started making Burrito In A Jar when I realized how much food I was wasting by not using up those half-bags of beans or leftover broth. This recipe uses up those odds and ends, and you can swap in what you have on hand. It’s also a good way to make sure you’ve got something filling and flavorful ready to go, even if you haven’t made it to the store in a while.
Whether you’re planning ahead for busy nights, looking for a meal to share with friends, or just want something easy and satisfying, Burrito In A Jar is worth a try. You get the comfort of a burrito, but with the convenience of a ready-made meal. And if you’re into meal prepping or reducing food waste, this one checks all the boxes.
The Magic of Burrito In A Jar
Click here to get printable version
In Your Basket
- ½ cup dry pinto beans
- ¼ cup uncooked rice
- ⅓ cup diced onion
- ⅓ cup chopped bell pepper
- 1 cup cooked ground beef, drained
- 4 tablespoons Rotel (diced tomatoes and green chilies)
- 1 tablespoon taco seasoning
- ½ teaspoon salt
- Beef broth (enough to fill quart jars, leaving 1-inch headspace)
How to Make It Happen
- Start by layering the ingredients into each clean quart jar in this order: first, add the dry pinto beans, then the uncooked rice, followed by the diced onion and chopped bell pepper. Keep the layers even so everything cooks properly.
- Spoon in the cooked, drained ground beef next. Pour the Rotel (diced tomatoes and green chilies) over the beef, then sprinkle the taco seasoning and salt on top.
- Fill the jar with beef broth, leaving about 1 inch of space at the top. This headspace is important for safe canning and to prevent overflow.
- Wipe the rims of the jars clean, seal them tightly with lids, and place them in your pressure canner. Process at 10 pounds of pressure for 90 minutes. Always follow your canner’s safety instructions and adjust for altitude if needed.
- When you’re ready to eat, open a jar, heat the contents on the stove or in the microwave, and spoon the mixture into soft tortillas. Add fresh toppings like lettuce, tomatoes, cheese, or whatever you prefer.
Easy Swaps for What’s in Your Pantry
If you don’t have pinto beans, black beans or kidney beans work just as well. Brown rice or even quinoa can stand in for white rice, though you may need to adjust the liquid slightly. Ground turkey or shredded chicken can replace the beef for a lighter version. If you’re out of Rotel, use canned diced tomatoes and a pinch of chili flakes. You can also swap in vegetable broth for beef broth if you want a milder flavor or need a vegetarian option (just skip the meat). This recipe is forgiving—use what you have and don’t stress about exact matches.
Perfect Pairings & Serving Suggestions
Burrito In A Jar is versatile when it comes to serving. It’s great wrapped in tortillas, but you can also spoon it over baked potatoes, serve it as a burrito bowl with extra greens, or top it with a fried egg for breakfast. Pair it with a simple salad or a side of roasted vegetables for a complete meal. For gatherings, set out a toppings bar with shredded cheese, sour cream, salsa, and avocado so everyone can build their own. It’s also a solid option for meal prep lunches—just pack a jar and a tortilla, and you’re set.
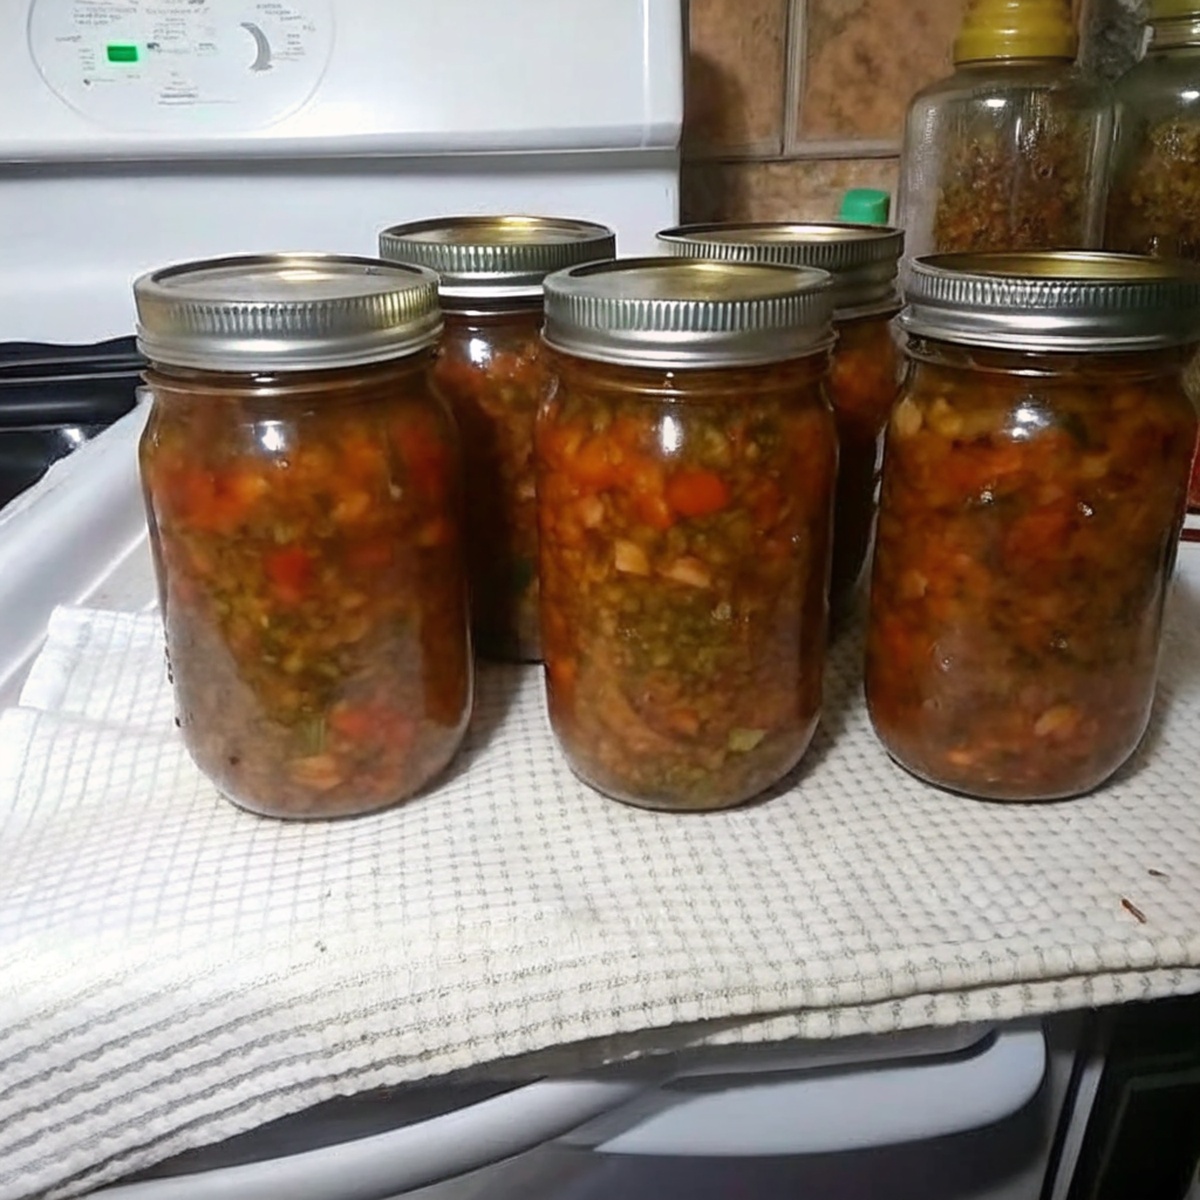
How to Store for Tomorrow’s Craving
Once canned, these jars keep well in a cool, dark place for up to a year. After opening, any leftovers should be transferred to an airtight container and refrigerated; they’ll stay good for 3–4 days. If you want to freeze the mixture, let it cool completely before portioning into freezer-safe containers. Thaw overnight in the fridge and reheat as needed. Never freeze sealed glass jars, as they can crack. Always check for signs of spoilage before eating—if the seal is broken or the contents smell off, discard it.
Tips for Getting That Ultimate Comfort-Food Taste
For the best flavor, use freshly ground spices in your taco seasoning if you can. Browning the ground beef well before adding it to the jar adds depth. If you like a little heat, toss in a few chopped jalapeños with the bell peppers. Taste your broth before adding—it should be well-seasoned, as the rice and beans will soak up a lot of flavor. Don’t skip draining the beef; excess fat can affect the seal and texture. And always let the jars cool undisturbed after canning for the best results.
Adapting This Comfort Dish for Any Season
In summer, add fresh corn or zucchini to the mix for extra sweetness and color. During colder months, stir in a spoonful of chipotle in adobo for smoky warmth. For spring, try adding chopped spinach or cilantro just before serving for a burst of freshness. If you’re making this for a holiday or special occasion, serve it with a side of homemade salsa or pickled onions. The base recipe is flexible, so you can adjust the flavors and add-ins to match what’s in season or what you’re craving.
Frequently Asked Questions (FAQ)
Can I use canned beans instead of dry beans?
It’s not recommended to use canned beans in this recipe if you’re pressure canning, because the beans may become overly soft or mushy after the long processing time. Dry beans are best as they cook during the canning process and help absorb flavors. If you’re making a quick version to eat right away, you can use canned beans, but reduce the canning time and broth accordingly.
How do I know if my jars have sealed properly?
After processing and cooling, check the lids for a firm seal by pressing the center of each lid. It should not flex or pop. If a lid hasn’t sealed, refrigerate and use that jar within a few days. Never store unsealed jars at room temperature. Always inspect for leaks, bulging lids, or off smells before eating.
What’s the best way to adjust for altitude when pressure canning?
If you live above 1,000 feet, you’ll need to increase the pressure according to your canner’s instructions—usually by 1 additional pound for every 2,000 feet above sea level. Always consult your pressure canner’s manual for exact adjustments to ensure safety and proper preservation of your Burrito In A Jar.
Can I make this vegetarian or vegan?
Absolutely. Omit the ground beef and use extra beans or a plant-based meat substitute. Swap beef broth for vegetable broth. You may want to add extra seasoning or a splash of lime juice for brightness. The rest of the process remains the same, and you’ll still get a hearty, flavorful meal in a jar.
Why do I need to leave headspace in the jar?
The 1-inch headspace allows for the food to expand during the canning process and helps ensure a proper vacuum seal as the jars cool. If you overfill, the contents can seep out and prevent sealing, or cause jars to break. Always measure headspace carefully for safety and best results.
Can I double or halve the recipe?
Yes, you can easily scale the recipe up or down depending on your needs. Just keep the ingredient ratios the same and make sure not to overfill your jars. When canning, process all jars for the full 90 minutes regardless of batch size to ensure everything is cooked and preserved safely.
Burrito In A Jar
Equipment
- Pressure Canner
Ingredients
- 1/2 cup dry pinto beans
- 1/4 cup uncooked rice
- 1/3 cup diced onion
- 1/3 cup chopped bell pepper
- 1 cup cooked ground beef drained
- 4 tablespoons Rotel (diced tomatoes and green chilies)
- 1 tablespoon taco seasoning
- 1/2 teaspoon salt
- Beef broth enough to fill quart jars, leaving 1-inch headspace
Instructions
- In each quart jar, layer your ingredients as follows: start with dry pinto beans, then add the uncooked rice, followed by the diced bell peppers and onions.
- Next, add the browned and drained ground beef to the jar, and then spoon the Rotel over it, finishing with the taco seasoning and salt.
- Top off the jar with beef broth, ensuring to leave about an inch of space at the top for expansion during canning.
- Seal the jars firmly and place them into your pressure canner. Process the jars at 10 pounds of pressure for 90 minutes to safely preserve your burrito mix.
- When ready to enjoy, simply heat the contents and wrap them in soft tortillas. Enhance with fresh lettuce, tomatoes, or your desired burrito toppings for a delightful meal.